Sidewize Scrolling Graphics Breakdown
Following on from the Odin Computer Graphics Part Two post where I mentioned Sidewize, I thought I'd delve into a little more detail on the construction of the Sidewize scrolling backdrops. Sidewize actually does run at 50 frames per second with zero flicker, on real hardware (issue 2 Spectrums, at least). YMMV on emulators, since this game is running really close to the metal! Back in 1987, with a Speccy connected to the typical RF connector on the TV, this was truly a joy to behold!
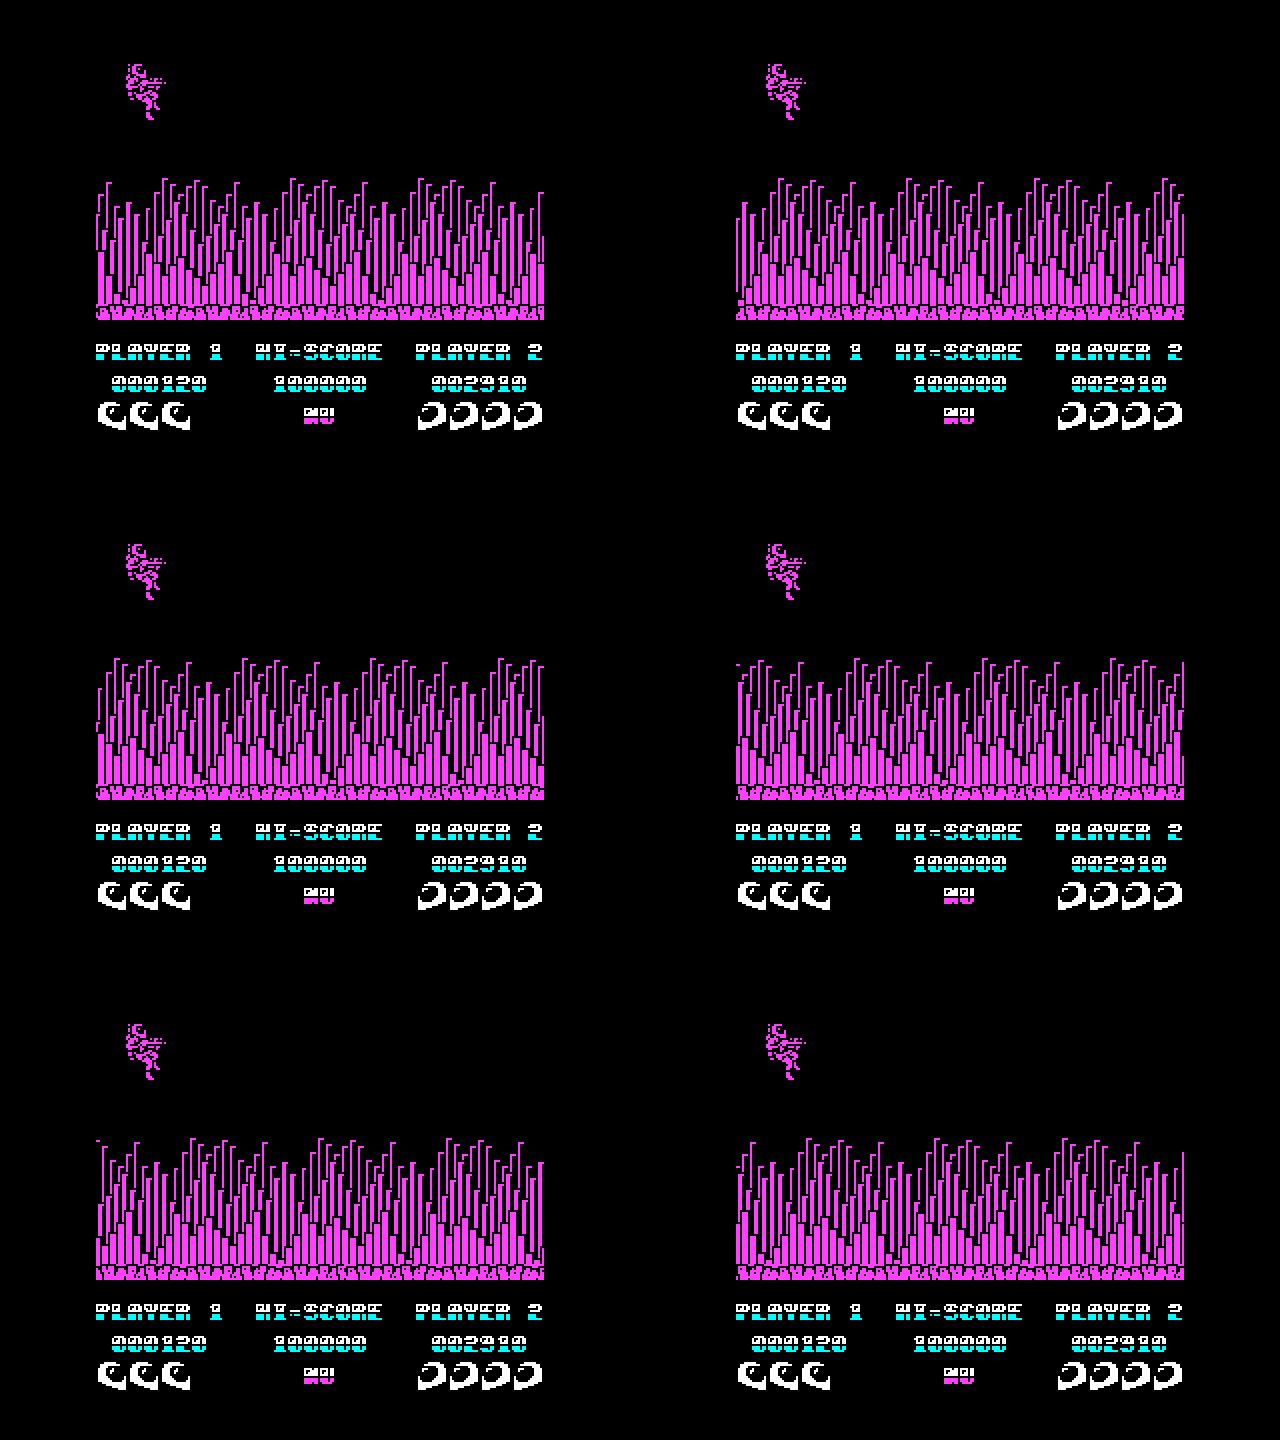
The game itself looks something like this when running (yes, I know there is a slight glitch in the "ground" scrolling area. That does not occur in the game and only occurs here because I got fed up fighting with Photoshop).
 |
| Typical appearance of a running Sidewize scrolling level |
 |
| 64x64 pixel block used to compose the backdrops |
There is a trick to making these blocks scroll smoothly. In Sidewize, I create 8 instances of this block in 0, 2, 4, 6, 8, 12, and 14-pixel shifted offsets, such that pixels scrolling off the left edge wrap-around, and appear on the right side of the block, creating 8 pre-shifted blocks. This is why these blocks need to tile horizontally.
Armed with these 8 pre-shifted blocks, we can now compose a scrolling backdrop by tiling these blocks side by side, and offsetting the position of the tiles for every 16 pixels of "movement". To illustrate this, I've extracted one tile below and you can see how it moves across the screen. Since each block is shifted in units of 2 pixels, we move the block to the left every 8 updates or every 16 pixels. I've slowed down the movement in order to illustrate this a bit better.
 |
| Illustration of Sidewize "pre-shifted blocks" employed to compose the scrolling backdrop |
The scrolling foreground "floor" was done using a similar technique. The thing with this graphics configuration is that it then becomes very easy to blast these blocks to the screen using the stack pointer based techniques I mention in the Odin pt. 2 post.
And so that is how Sidewize was done!
The sequel to Sidewize, Crosswize, while building on some of the coding techniques developed for Sidewize, was much more elaborate, and I'll put together a visual illustration of how it composed the scrolling backdrops in a future post.
The sequel to Sidewize, Crosswize, while building on some of the coding techniques developed for Sidewize, was much more elaborate, and I'll put together a visual illustration of how it composed the scrolling backdrops in a future post.
See here for more technical info on Sidewize!
If you enjoy my blog, you can help support it by buying me a coffee!


Comments
The other discovery was based on a rumor that was going around at the time, which is that "there is a port on the Spectrum where you can read the current attribute value". I was never told which port that was (or at least, it didn't work as advertised when I tried it) but I did discover a useful variant. I found that by reading port 0x40ff, you could in fact read the current attribute value (meaning, the current color of the screen area that the display raster crossing), in addition to some other values which I took to be bitmap bytes. I believe the attribute value finds its way onto the bus due to some side effect of the way the Spectrum ULA works (the so-called "floating bus" in the Spectrum), but ultimately this allows you to wait for a specific point on the screen if you manage your screen attributes carefully. Not quite as nice as a horizontal blanking interrupt, but useful nonetheless. I ended up waiting for the very bottom of the useful gameplay area (this was essentially the top two-thirds of the screen - the status panel lived below).